I feel like one of the guys on American Chopper - ;>)
Started July 18, 2007
Originally, I was going to pay the $800 or so and have my exhaust system fabricated by one of the several companies that do it. Then, after some conversation with Bob Barrows, I was convinced to simply fabricate my own. The exhaust system is made from 1 1/2" EMT conduit, available from your local Home Depot or Lowes hardware store. For about $50 I picked up about 20 feet of straight 1 1/2" galvanized conduit and some 90 degree pre-bent angles of the 1 1/2" conduit. I will not have a muffler and my 4 exhaust pipes will run out of the cowling exit area with a slight downturn. (Caution: When welding galvanized steel, do not breath the fumes and have a well ventilated area with some air moving the fumes away from you).
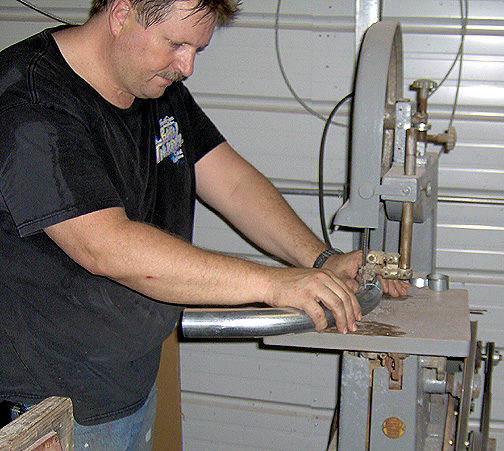
The straight pipes were cut using a 14" cutoff saw with metal cutting disc
installed. The curved portions were cut on the bandsaw. Here
I am working on cutting one of the 90 degree angles to fit the cylinder head
better and come out at the correct angle:
I feel like one of the guys on American Chopper - ;>)
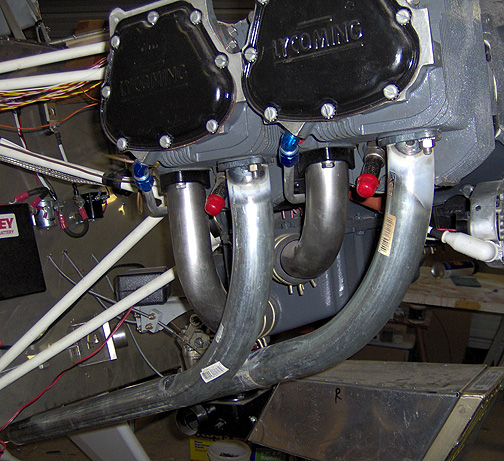
Here is the right side of the engine with both exhaust pipes just tack welded
for now:
Now, with it all tack welded only, I will check the fit of the bottom cowl to make sure that I have good clearance.
To check clearances, I attached the nose bowl and the cowling side
channels:
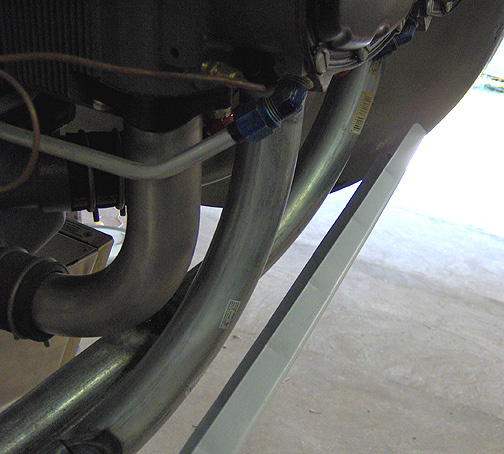
As you can see, I have plenty of clearance at the nose bowl and the side
channels.
With everything fitting and the clearance from the cowling and nose bowl looking good, it's time to take the exhaust assemblies off and do the final welding of the flanges and splice points of the pipes.
With the right side completed, it was time to start on the left side. There is more room on the left side because the cylinders on that side are offset aft, away from the nose bowl. Even though there was more room and clearance on the left side, I still manufactured the exhaust to tuck in closely with the bottom of the engine for maximum clearance from the bottom cowl.
Here is the left side fitted and tack welded:
Again, the two exhaust pipes run parallel to the boot cowl tunnel.
All of the exhaust pipes were then cut to be the same exact distance from
the firewall (about 1 1/2"). The elbows were then positioned on the
exhaust pipe to point downward and were tack welded:

After tack welding they were checked for fit and that they were all even
and parallel with each other. After a little trimming here and there,
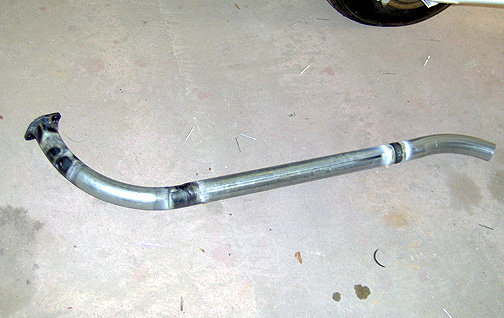
they were final welded. Here is one of the complete exhaust pipes
at this point:
The cabin heat muff will be eventually mounted within the long straight area
away from any welds.
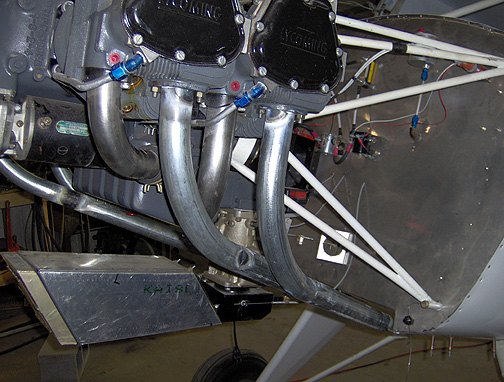
Here is the bottom cowl outlet with all four exhaust pipes exiting the bottom
cowl:
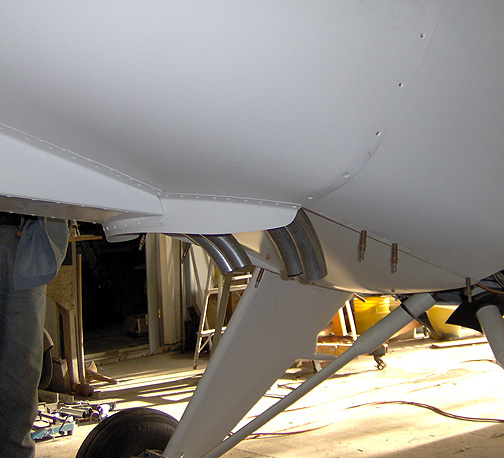
|Like I said, it took a little trimming and re-positioning to get them all
nice and even but it looks good now. I like the nice, smooth rounded
flow of these pipes. They are totally unrestricted and should help
the engine produce some good horsepower.
To tie the exhaust pipes together for strength, I made spacers from aluminum nad clamped the spacers between the pipes with a large hose clamp. Note that the spacer is concave rounded on each side to properly fit the 1 1/2" pipes.
Here is what it looks like installed:
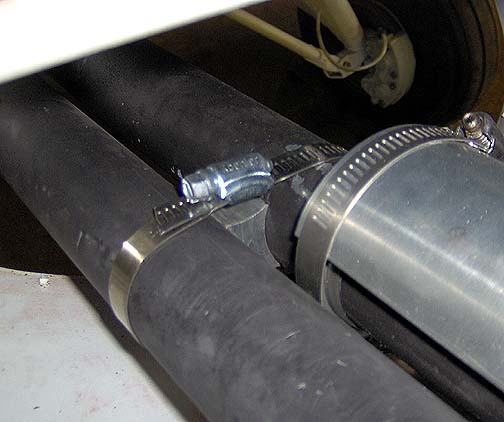
With the hose clamp tightened, the two pipes are snugly clamped together.
The other thing you see is the carb heat muff. That will be covered
later.
Exhaust System
Completed: July 27, 2007
Total Time: 26 hours
Click here to go the Firewall Forward page
Click here to go to the Home page
That's it for the exhaust. After drying for a couple of days, these
were mounted to the engine using the "blow proof" gaskets, lock washers and
nuts. Note, the high heat paint is still a bit soft until the engine
is run for the first time and the heat up.
Click here to go to Exhaust page 2