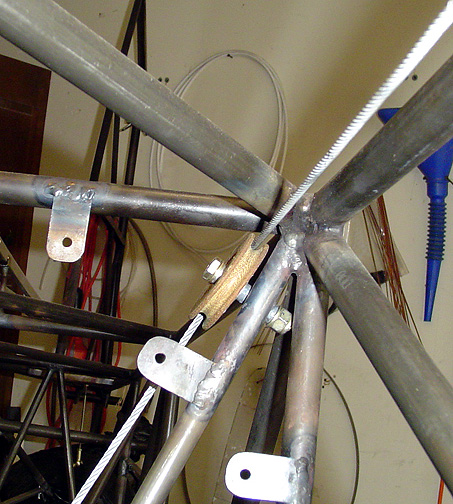
One of the last things that I want to do before fitting up the wings is to install the flap pulleys. I originally had thought about doing this as part of fitting the wings up but decided against it when realized that I had to weld very near to the rear wing spar, which is aluminum.
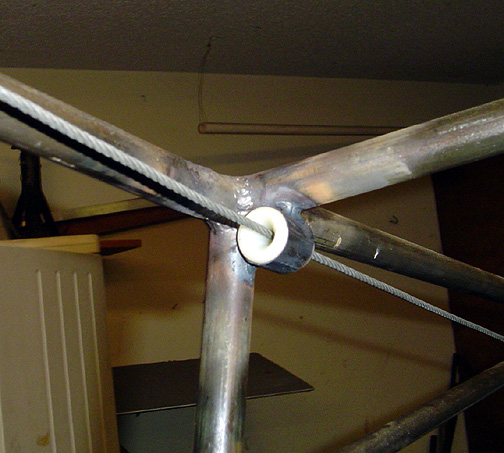
The bushing tube was welded to the fuselage frame and then cut to the proper
length. After the tube completely cooled, the pulley was bolted in
place with the cable to re-check for proper alignment:
Going forward, a fairlead is welded to the top inside corner of station "M"
as shown by the arrow on the right hand side of the picture below:
Here is a closeup of the fairlead at station "M" on the passenger's side:
Note: The above fairlead is simply some 7/8" x .035 tube cut to
3/4" long and welded in place. The plastic part (available from any
aircraft part supply house) is a split nylon bushing and simply slips inside
the tube, then is held in place with a spring clip.
The next location for a pulley is right below the rear wing spar attach point.
The bushing is first welded to a 1" long standoff made from some of
3/8" tubing.
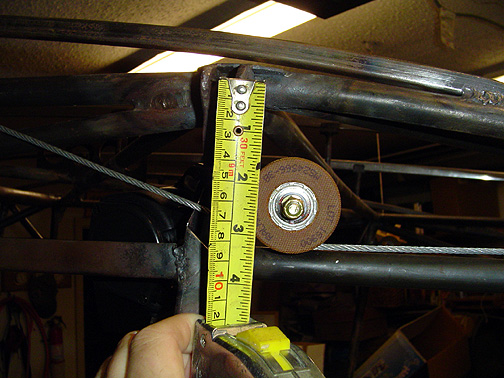
The pulley was aligned so that the cable runs back to the future fairlead
and forward just under the wing spar attach bolt hole. To achieve proper
clearance, the center of the pulley should be located 2 1/2" below the wing
spar attach hole as shown here:
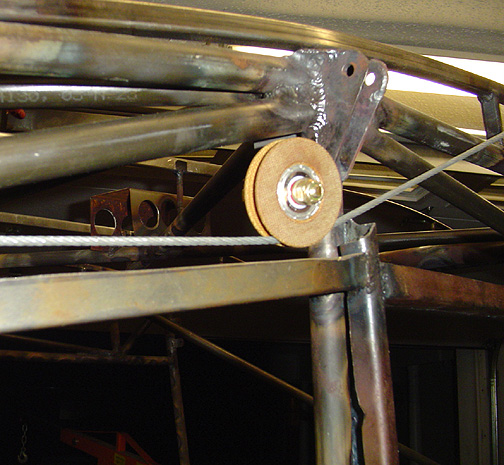
After cooling, the bushing was trimmed to length and the pulley was installed,
again checking for proper alignment:
That's it for now until I get the wings mounted. Once the wings are on, I'll cover final rigging of the flap system. That will be on a different page.
Flap Pulleys
Completed: 03/09/06
Total Time: 8 hours
Click here to go to the Fuselage index page