Priming the Fuselage Frame page 2
Now for the sandblasting. I purchased a 40 lb. pressurized sandblaster
from Harbor Freight Tools. My
original idea was to use 2 compressors and switch back and forth using one
while the other pumped up again. Well this failed miserably. I
ended up sandblasting for one minute and then waiting five minutes for the
compressors to recharge. The sandblaster really needs about 60CFM at
100 PSI to continue sandblasting without stopping. So I went to my
local rental store and rented a tow behind, commercial diesel operated
compressor. This baby puts out 200CFM. at 125 psi. As Tim "the tool man"
Taylor would say: "aurgh, aurgh, aurgh" The engine on the big compressor
didn't even come out of idle mode for this job. It was $75 for the
weekend but worth every penny.
The sand I used was #4 sandblasting sand formulated especially for sandblasting.
The rental place carried it. Regular old play sand or sand from
the beach is too smooth to cut very well.
Here I am starting the sandblasting process at the tail:
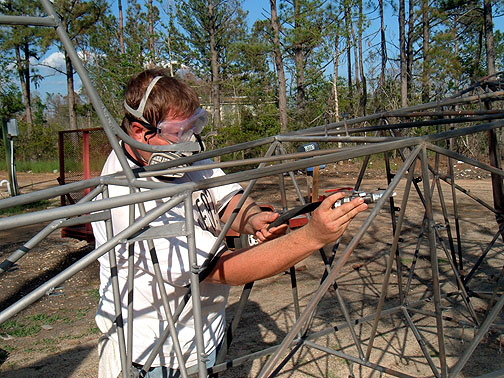
If you look at the top longeron, closest to you in the picture, you can see
where its been sandblasted and where it hasn't. The lighter gray to the left
has been sandblasted and the darker to right has not been
sandblasted. Just take your time and get in every cluster and nook
and cranny. The sandblasting process leaves a nice clean surface that
is kind of grainy rough so its perfect for paint adhesion.
It took several hours and about 700 lbs. of sand to complete the fuselage.
Once completed, it was thoroughly blown off with an air hose and then wiped
down real well with some Naptha.
The primer used is my old tried and true EP-420 epoxy in white. This
is a 2 part catalyst epoxy primer and is practically bullet proof once it
cures. The fuselage was primed with 3 to 4 coats of the Epoxy primer
and allowed to cure for one week.
Here it is after priming:
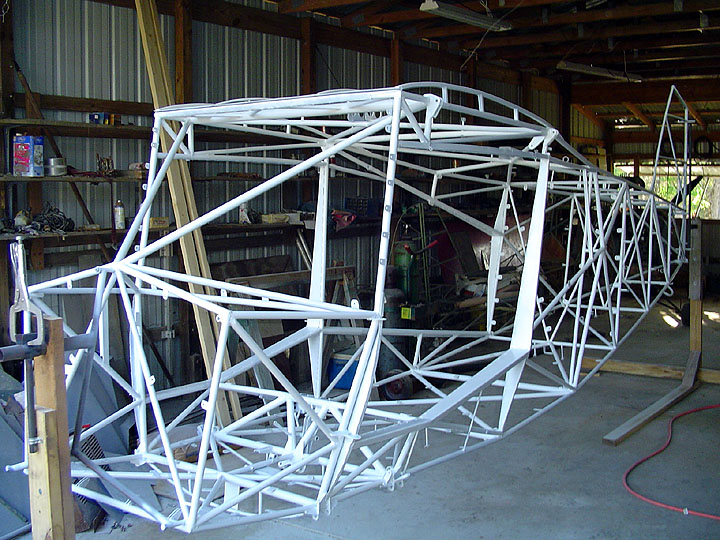
Sandblast & Prime Fuselage
Completed: 05/14/06
Total Time: 20 hours
Click here to go Home