February 20, 2009
I have about 65 hours on the Miss'ippi Mudbug now and have been so busy having fun that I have neglected to fix a few squawks that I have been living with. Well I finally shut down this week and fixed some of them. I also learned a couple of things along the way that I will share here:
Squawk #1 - Engine Vibration:
One of the remaining squawks that I was dealing with on my Bearhawk was a vibration that could be felt at any engine RPM higher than 2400 and increased as the RPM's increased. The vibration was felt through the panel and glare-shield over the instrument panel and through the control stick a bit. It wasn't intense enough to be scary but was bothersome. I usually cruise around at 2400 RPM or less but on those occasions where I wanted to go a bit faster to get home before dark, I would run at 2600 RPM and would feel the vibration.
I am scheduled to have my prop dynamically balanced at an airport up in Memphis, TN and weather permitting will travel up there next Friday. In the meanwhile, I started doing a little research on airplane vibration. One guy said to make sure the engine mounts are properly torqued and that the rubber bushings are in good shape. He also said to make sure the bolts that attach the engine mount to the fuselage are torqued properly. I checked all of that and found everything to be correct and the engine mount bushings are practically new.
Another guy said to check that the engine and engine baffles are not making contact with the cowling or nose bowl anywhere. Upon closer inspection, I found that the baffles had indeed been touching the upper right cowling door for about a 3 inch long place near cylinder #1. There was a groove worn into the inner side of the cowling door. The baffles were also making slight contact with the reinforcement "C" channel on the top of the cowling. So I trimmed the baffles down a bit near cylinder #1 and slightly bent the channel legs near the top rear baffles.
Test flight and guess what? NO MORE VIBRATION !!!- she's as smooth at 2700 RPM as she is at 2400. Who would of thought that the engine baffle slightly touching the cowling would send the vibration through the airframe. The baffles were not touching when inspecting them on the ground, but in flight with the engine torqued up a little, the slight movement put the engine baffle in contact with the cowling.
Moral of the story, make sure that you have 1/2" of clearance everywhere when you fit your engine baffles to your cowling.
Item #2 (not really a squawk) - Instant 5 MPH speed increase:
I had been told that the Poly Tone paint can be polished and waxed to increase
the shine. So, I finally washed, polished and waxed the fuselage of my Bearhawk
with some Carnuba wax. Keep in mind that my Bearhawk fuselage was painted
with Poly-Tone which is not as slick as the Poly-Urethane paints that a lot
of builders are using. However, polishing and waxing the Poly Tone paint
with Carnuba wax ,I was able to achieve a pretty good shine. I spent the
day with a polisher (with foam pad) and some light-weight polishing compound
and then followed it up with a nice coating of Carnuba wax. Well the Miss'ippi
Mudbug is now shining like a new
penny:
The fabric parts didn't get quite as shiny as the metal parts because of
the fabric weave. Done correctly, you should be able to still see the
weave. If you put the primer and paint on heavy enough to totally fill
the weave, you are adding a lot of extra, un-needed weight. Here is the cowling
and spinner after polishing and waxing (again, this is Poly Tone
paint):
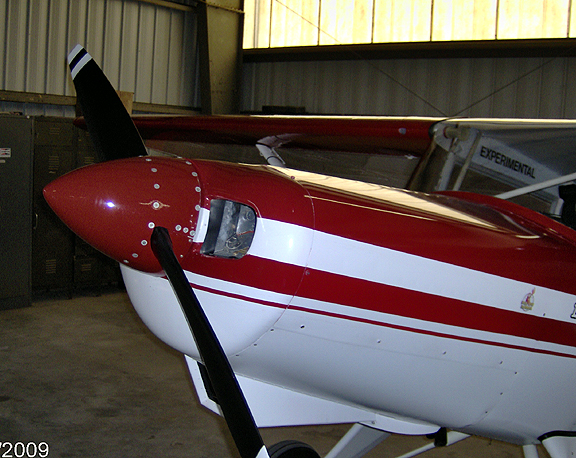
Not bad huh?
One unexpected pleasant surprise came the next time I flew after waxing the airplane. As I leveled off at 1500 feet and stabilized in a cruise at 75% power, I looked down at the airspeed indicator and saw 142 MPH TAS. Before the wax job, I was seeing 137 MPH TAS at that power setting and altitude. WOW! A 5 MPH increase in airspeed and all I did was polished and waxed the top and sides of the fuselage. I haven't even touched the belly or the wings yet! With that kind of speed increase, I'm inspired to go ahead and wax the belly and wings to see what kind of increase in speed I get (if any) after that. Surprising results.
Squawk #3 - Heavy Right Wing:
If you have read my accounts of the first flight, you know that I had a heavy right wing. I did all the usual stuff like squeezing the trailing edge of the aileron on the "Light" wing and adjusted the flaps, etc. and that got rid of the heavy wing and she flew straight and level, hands off. However, at that point I hadn't installed the aileron and flap hinge pocket covers yet.
A few months later, I finally got around to making and installing the hinge covers hoping for a little speed increase from the reduced drag. Well, not much speed increase was realized, however, my heavy right wing returned. I adjusted the ailerons, flaps and squeezed the trailing edge of the "light" wing some more but to no avail, I still had a heavy right wing. I called Bob and the first thing he asked me was if I had read the Engineering notice in the Oct-Nov-Dec 2006 Bear-Tracks Newsletter that talks about putting a washer under the bottom legs of the aileron hinge on the heavy wing. Why no, I guess I had missed that little paragraph the first time I read it.
So I installed the washers, put it all back together and went flying. Well that helped a bit but I still had a slightly heavy right wing. At this point I had adjusted my flaps and ailerons so much that nothing lined up anymore when sitting on the ground. When in straight and level flight, the right aileron would ride up about 1/2" at the trailing edge and the left aileron would ride up only a little (less than 1/4"). Sitting on ground, they both are slightly lower than the wingtips. Additionally I had the flap on the heavy wing (right) adjusted with the trailing edge lower than the wing root rib, and the left flap adjusted to be higher than the wing root. With all of that, I still had a slightly heavy right wing. The faster the speed, the higher the force needed to keep the wings level.
I then went back and rechecked the angle of incidence on both wings, both at the root and at the tips and they were identical. I measured the angles of both horizontal stabilizers and they were equal. I put a washer under the top legs of the left aileron hoping to do the opposite of what putting a washer under the right side bottom legs would do, and still no joy. The heaviness was not real major and just flying around the local area it was mostly just a small nuisance, but when going on a 3 hour cross country, the arm started getting a bit tired having to hold constant pressure on the stick to keep the wings level.
I called Bob again, asking for any more ideas and we discussed it for a while. Basically, short of doing something major like re-doing the wing incidence, the only thing left to do was to install a small trim tab on the ailerons. I really didn't want to install trim tabs because it just seemed like admitting defeat. As I was walking around the hangar trying to decide about the trim tabs, I got to looking at a nice Bonanza that shares the hangar with me and low and behold, right there on the aileron was a trim tab. Well that was my decision maker to go ahead with the trim tabs.
To make them as small as possible I decided to go with one on each aileron
instead of just putting it one side. So I took some .020 aluminum and put
a "joggle" along one edge about 3/4" in from the edge. This joggle will allow
the trim tab to sit flat on the trailing edge of the aileron and then have
the protruding edge aligned with the center of the trailing edge for better
looks. Each trim tab is about 5" long and sticks out past the trailing edge
only about 3/4". I positioned them to align with the ribs on either side
of the inboard hinge. They were then pop riveted to the bottom side of the
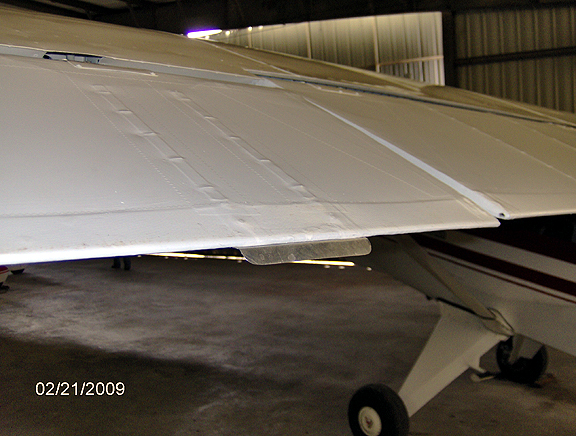
ailerons trailing edge. The way they are installed, they are really
almost unnoticeable. Here is the one on the right
aileron:
Keep in mind this isn't painted yet. Once painted to match the aileron,
I don't think they will be that noticeable.
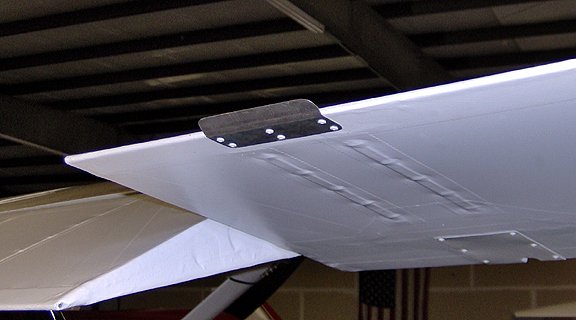
Here is the top view showing the one on the left
aileron:
The trim tab only sticks out about 3/4" The above picture it looks
bigger than that because of the angle and because I'm zoomed in.
After installing the trim tabs, I bent the one on the right aileron up about 30 degrees and bent the one on the left aileron down about 30 degrees and went flying. The heavy wing was almost totally gone even at full speed. There was still just a slightly heavy right wing so I landed and re-bent them just a bit more and went up again. The heavy wing problem is now totally gone ! Yahoo! I can now take my hands and feet totally off the controls and she keeps flying straight and level and the ball stays centered.
Like I said, I really hated to put the trim tabs on, as it was almost like admitting defeat but the airplane is much more enjoyable to fly now without having to hold left pressure on the stick the whole time. Bob said that he wants to take a look at it at Sun N' Fun to see if there is something I am missing. He talked about doing something to limit the airflow through one the aileron pockets to possibly stop the one aileron from wanting to ride up so much. If he does figure out something else, I can always remove the trim tabs and cover the holes (an easy fix since I used Poly-Tone paint).
So that's about it on the squawks. The engine is now fully broke-in and burns less than a quart of oil every 10 hours. I've sent in a sample of each oil change and the results are good. She runs strong and smooth and flys hands off. My speed pretty much matches the speed that Bob gets with Proto 1 (Proto 1 has a constant speed prop and is 200 lbs lighter). My take-offs are very short and climbs are easily 1300 feet per minute at seal level on cool days. All in all, this is the perfect airplane for my needs.
I'm still going to get the dynamic balance done on the prop and I'll update the website when that gets done. Other than that, I plan to install an autopilot that runs off the Dynon D100 to reduce pilot workload on long cross country flights.