Started August 1, 2004
The ailerons and flaps are an aluminum frame that is covered in fabric which is rib stitched in place.
There are a few different fabric covering systems out there and its up to you which one to choose. Whichever you choose, its best to stay with the same system throughout, using all of the products that come with that system from metal primer, to fabric, and all the way through the final paint.
I chose the Poly Fiber system and really like it. I would highly suggest that you purchase their instructional video and book from one of the aircraft supply stores. The video is a real life saver for a beginner.
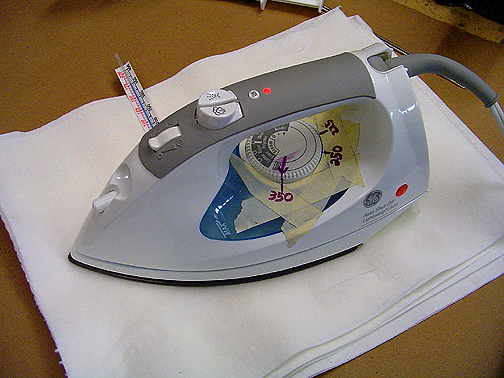
The very first thing to do is acquire all of the materials and tools needed. You will need a good (at least 1100 watt) household iron. To keep peace in the family, I opted to purchase a new one at Walmart for about $25. Mine is a 1200 watt iron. I also purchased a small corner iron from Wicks.
It is critical that the iron be properly calibrated. Holding exact temperature (with +/- 10 degrees) is very important to getting the fabric to shrink the proper amount without burning or melting it. To do this, I followed the instructions in the Poly Fiber manual:
As you can see, I have marked the settings for 225 degrees, 250 degrees and 350 degrees. All of the above temps will be needed during the covering process.
Before covering begins, all of the protrusions (rivets), edges and corners must be covered with some cloth type masking tape to keep the fabric from chaffing or being cut. Make sure you use the right tape for this:

Once the edges were all taped, the metal surfaces and anti-chaff tapes were pre-coated with two coats of Poly-Brush, which is pink. This will later help the fabric adhere to the metal.
Next, the fabric is rough cut to allow an overlap at both ends and to wrap all the way around the control surface.
Here, the fabric is wrapped around the trailing edge of the aileron, clamped in place and ready to be cemented in place with Poly-Tak cement:
Once the bottom edge of fabric was cemented to the trailing edge and allowed to dry for 15 minutes, the fabric was then pulled tight around the control surface and pulled back overlapping the trailing edge. A chalk line was then snapped right at the trailing edge and the fabric was trimmed to that line, then cemented overlapping the fabric that was previously cemented in place.
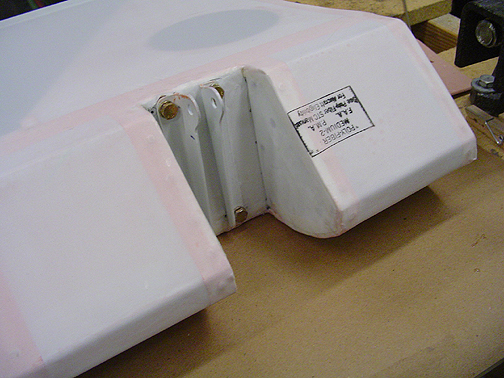
With the fabric secured at the trailing edge, it's time to cement the fabric to the ends of the control surface. The fabric at the ends were heat formed around the corners using a 225 degree iron. The fabric forms very well over the edge and looks like its a custom fit when done properly. The fabric was then cemented to the end ribs with a 1" overlap. The hinge openings were also cut, heat formed around the corners and then cemented in place.
I chose to make sure I had a fabric to fabric bond everywhere, so I cut little patches the exact shape of the end ribs and nose ribs, and then cemented them in place at the ends and in the hinge openings. Its probably not necessary, but I also ended up cutting little strips to go between the hinges and on either side of the hinges and cemented them in place.
I had thought about leaving the hinges off and just bolting them on over the fabric covering later, but after asking on the Bearhawk group, I was advised that the correct way is to have the hinges securely bolted in place with a metal to metal connection.
Once everything is secure and the fabric has been cemented on the trailing edges, ends and in the hinge areas, its time to shrink it. This is where the calibrated iron comes in.
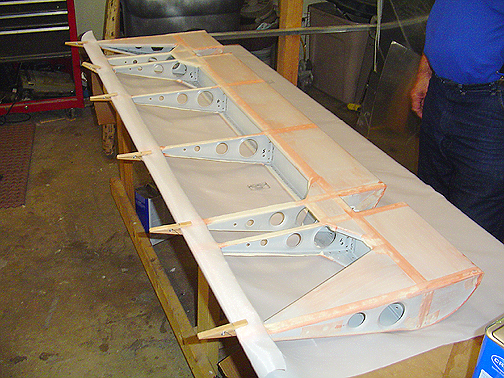
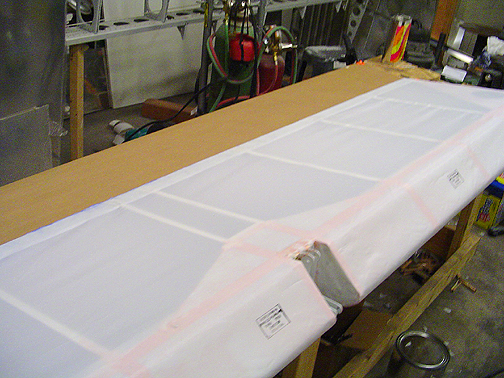
Here is a picture of the flap prior to heat shrinking the fabric (see the wrinkles near the ribs?):
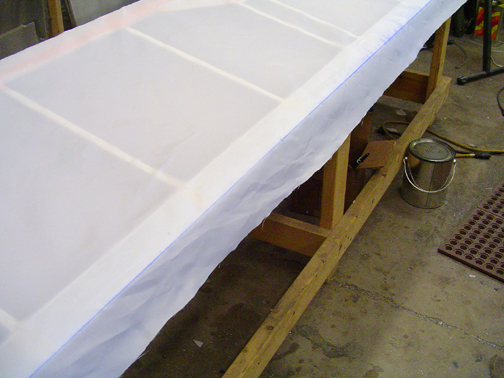
. . . and here is the same flap after heat shrinking first at 250 degrees, then at 350 degrees with the iron:
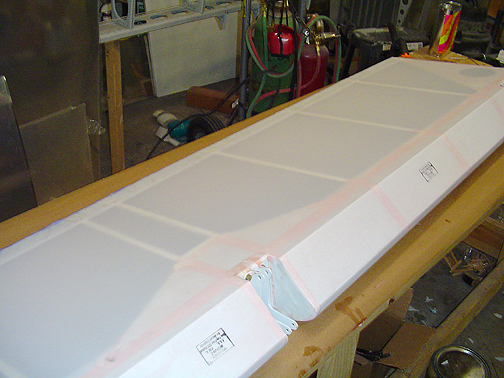
Its now tight as a drum and no wrinkles are present. Pretty cool stuff huh?
Next, I used the small corner iron, set at 250 degrees, and got rid of any wrinkles at the cemented joints. I also used some MEK and a clean cotton rag to get rid of any excess Poly-Tak cement that seeped out of the seams.
With everything looking smooth and wrinkle free, its time to seal the fabric weave. This is done with Poly-Brush. The Poly-Brush as the name implies, should be brushed on, not sprayed. This pushes it into the weave to seal it. If you are using enough, you will actually see the Poly-Brush starting to forms runs and drips on the inside of the fabric. It will have a slightly glossy surface. The Poly-Brush is tinted pink to help you know that you have good coverage. If it drips all the way through and puddles on the other side of the flap, you are putting on a lttle too much.
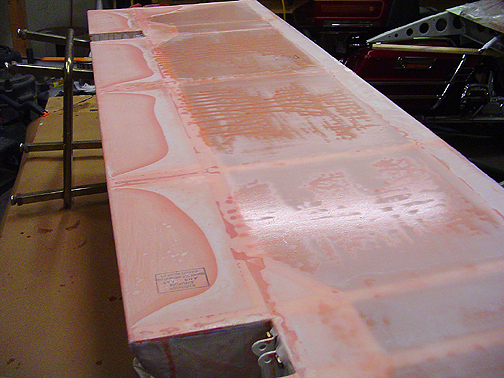
As you can see, the Poly-Brush is applied everywhere including over the ribs and all metal surfaces. Remember the two coats of Poly-Brush that we put on prior to covering? This coat is now interacting with the previous coat to assure good adhesion of fabric to metal. We have basically sandwiched the covering material between layers of Poly-Brush.
Click here to go to Covering Ailerons & Flaps page 2
Click here to go to the Wings Index page