Flanging the Lightening Holes
The plans call for most of the rib lightening holes to have a 3/8" wide flange at 30 degrees around each hole. This is to stiffen the rib web and reinforce the hole edges. There are several ways to accomplish this. I will do mine by using the two formblocks and a die block also made from the MDF wood.
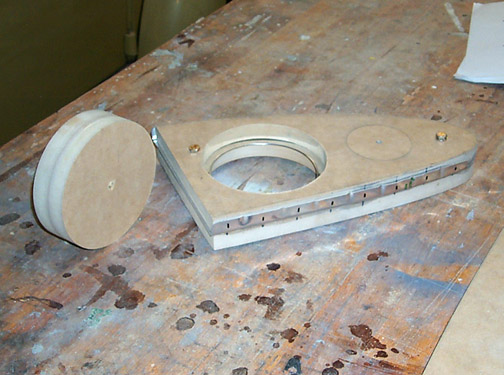
For the nose ribs, the two form blocks (used to form the flanges) were cut at the spar line. Then two large holes were cut in each of the two formblocks that were 3/4" larger than the lightening holes.
To make the flange, we started with the double thick piece of MDF. Using the flycutter, a plug for each hole was cut out of the double thick MDF that exactly fits the holes just made in the formblocks.
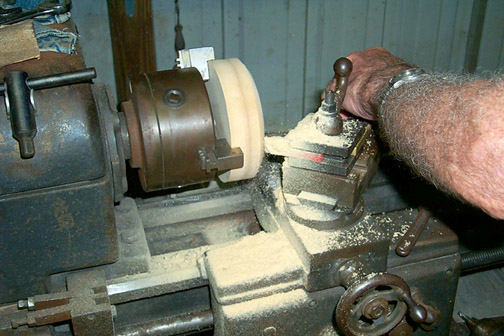
This plug was taken over to Mickey's shop and turned on his lathe to produce a 40 degree angle at its bottom edge, where it will make contact with the exposed rib material in the hole. The 40 degree angle allows for spring-back of the aluminum and gives a nice 30 degree bend.
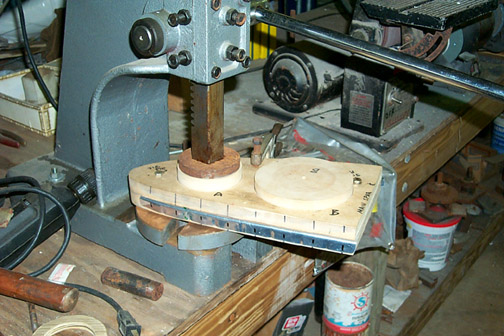
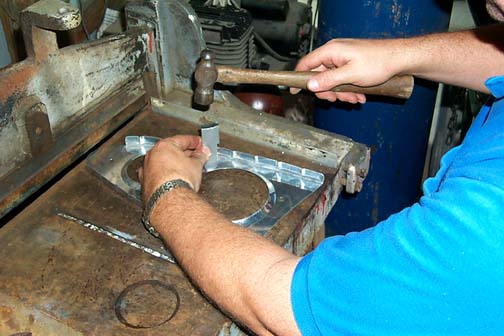
The nose rib was clamped between the two formblocks and bolted together through the jig holes. It was also clamped in the center between the holes to assure a nice tight squeeze. The pieces are then placed into the bench top press and the plug is then pressed down against the rib (bevel side down).
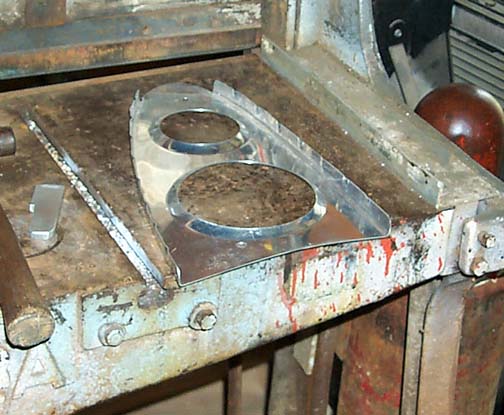
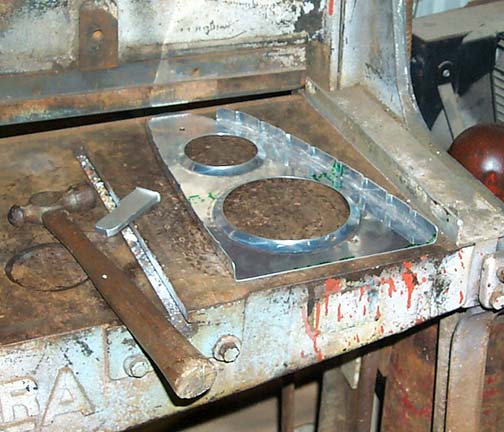
When done, you have a nice 30 degree flange that is 3/8" wide around the lightening holes in the rib. The only problem was there is now a bow in the rib lengthwise as can be seen in the picture below.
To remove the bow, we found that we needed to relieve the pressure around each hole created by the bend of the flange. To do this, we took some scrap aluminum bar (1/4" thick x 1" wide)and smoothed and rounded the end. The bar was then used with a small hammer to go around each hole right at the bend point and tap - tap - tap while pressing down on the rib to flatten it out.
It took a little trial and error and some practice to get it just right, but when done the rib lays nice and flat again. Here is the finished product after the stress relieving around the lightening holes:
That's it for the hole flanging. This system seams to work fine so it will be used for all of the remaining rib's lightening hole flanges. Its fairly easy, quick and accurate. It took us about 6 hours to flange all of the holes in the 46 nose ribs. Probably much faster than doing it by hand. The set up to cut out and bevel flanging plugs and to cut the holes in formblocks took about 2 hours total.
Click here to go to back to Nose Ribs page 2