We also made sure that the fuselage was level side-to-side as measured on the floor.
January 18, 2008
The ailerons were installed on the wing and the pushrod was attached between the each aileron and bellcrank. Then the ailerons were clamped in the neutral position on both wings, aligning them with the wingtips and the flaps.
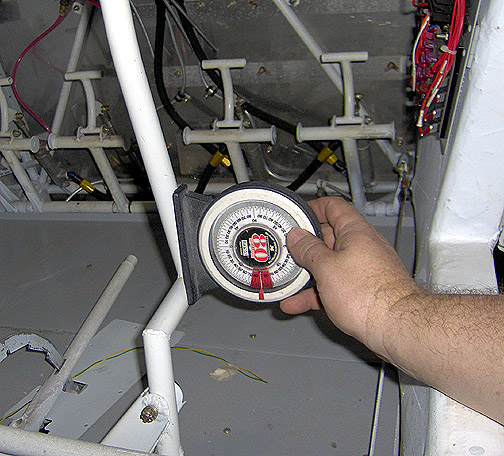
The control sticks were then positioned and braced to be perfectly vertical,
checking it with an angle finder dial indicator:
We also made sure that the fuselage was level side-to-side as measured
on the floor.
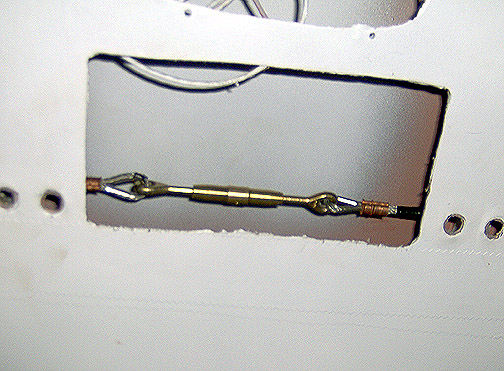
The cable that runs between the aileron bellcranks, across the top of the
fuselage was assembled first. The cable from each bellcrank meet at the center
of the fuselage, and are tied together with a turnbuckle to take up the
slack:
One problem that I encountered was that the cable was rubbing on the headset
jacks that were installed in the headliner. These will be re-located
and the holes will be covered by the cover plate for this inspection hole.
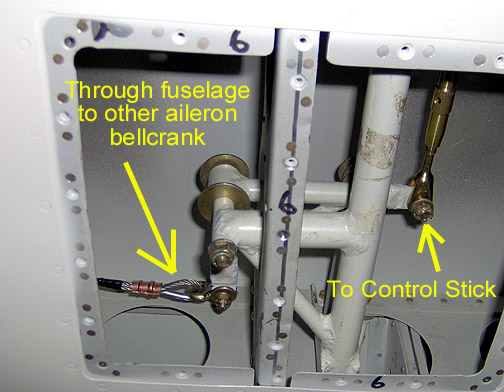
The other ends of this cable assembly attach to the aileron bellcrank in each wing as shown below.
The next cables to be installed run from each aileron bellcrank , around
some pulleys, down through the wing lift strut and to the bottom of the control
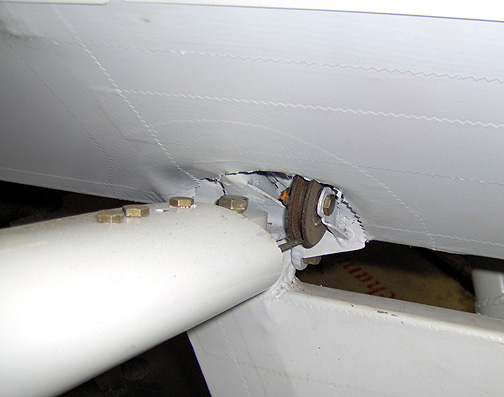
stick assembly. Here is the aileron bellcrank assembly in the left
wing:
Another turnbuckle is used at each bellcrank to attach the cables that come
from the control stick assembly. Note that the bolt/nuts used for connecting
the cables (and turnbuckle) to the bellcrank are castle nuts for cotter pins
as these are subject to rotation.
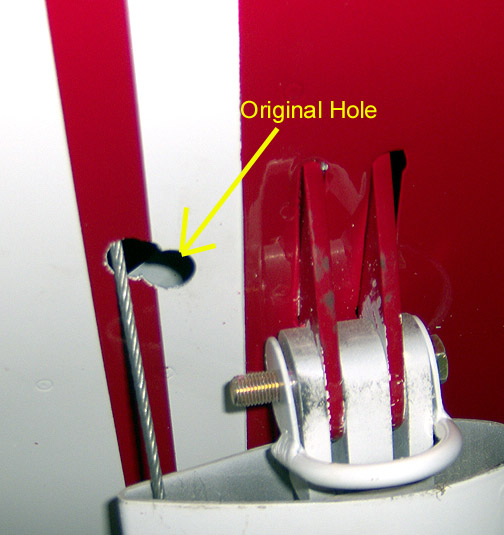
Despite my best guess for the hole placement in the wing skin where the cable
transitions into the top of the wing strut, I was off about 3/4" and the
cable was rubbing there. This hole was opened up with a round file
until the cable cleared the wing skin. This will be covered with the
fairing that will go here later, so no sweat:
At the bottom of each wing strut, the cable transitions through a pulley
to control sticks:
Note that this pulley does not have a cable retainer. It is installed
to run within 1/16" of the bottom longeron tube so that acts as the cable
retainer.
Here is the connection at the bottom of the control stick:
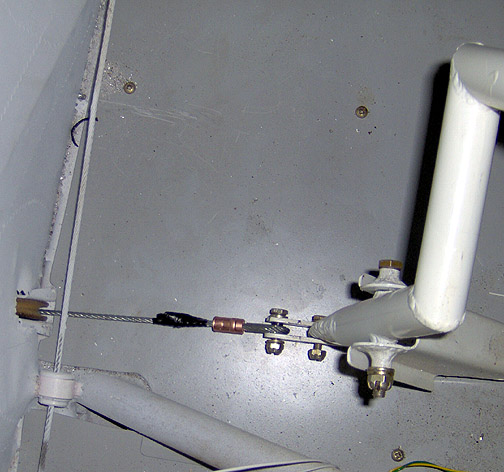
The bolt/nuts for the control stick and cable attachments still need to
be tightened and cotter pinned.
Click here to go to Rigging Ailerons page 2