Started 12/20/05
The stringers are non-structural supports for the fabric on the fuselage. They really shape the fuselage to help eliminate the square look and give it a more pleasing, rounded look. There isn't a lot of information in the plans on the actual shape that's trying to be achieved. Some folks say to place the strings and shape them until it looks pleasing to you. The stringers can be made from aluminum or wood. Aluminum is the lightest so I'll be using that. Aircraft Spruce has aluminum stringer material (P/N 03-48800) which is 5/16" x 5/8" and comes in 12 foot lengths.
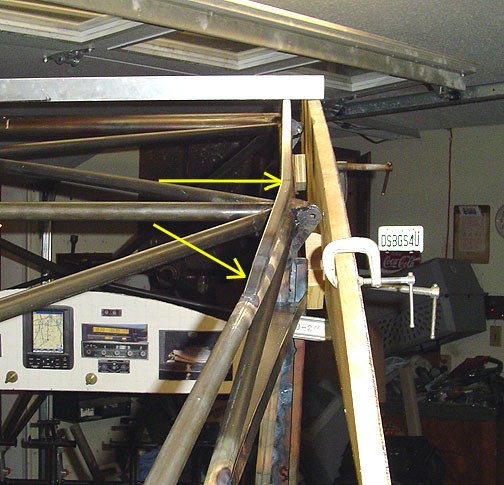
The top stringers run from the windshield back to the vertical stabilizer. They take the shape of the wing coming off the windshield, spaced about 14" apart, then head straight back to the vertical stabilizer where they come to a point. The wing formers were made from 1/2 x 1/2" square steel tube.
With the wing former perfectly matching the curve and height of the wing,
it was tack welded in place. The aft end of the wing former must be
bent slightly to match the bend of the top fuselage longerons:
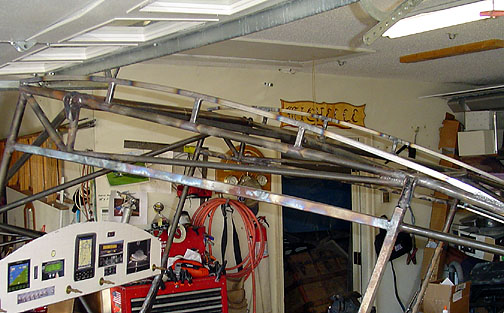
Here is a picture of the completed wing formers on the fuselage:
The next part needed is the slot that the windshield will slip into. It is formed from some .032 thick mild steel. I started by cutting a 43" long strip of .032 mild steel about 3" wide. Then a line was drawn 1" from the edge and the piece was bent on that line using a brake. A 1/4" rod was then placed against the inside of the bend and the piece was formed around the 1/4" rod until it was "U" shaped.
Here it is after welding in place at the cross tube of station "P":
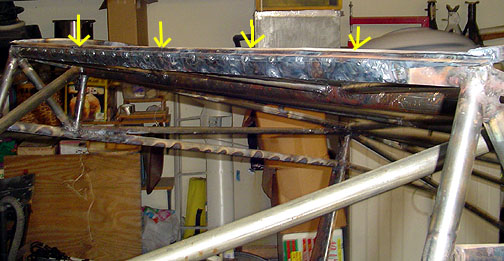
It is important to keep this piece straight.
Now, with the wing formers and windshield slot in place, we can start building the top fuselage stringers. If you plan on an overhead trim wheel for your elevator trim, you might want to install it now so you can make sure that your stringers are made tall enough to provide adequate clearance for it. My Bearhawk will have electric elevator trim so I don't have to make a hump between the wings. Therefore, my stringers will follow the curve of the wing formers until I reach the highest part of the wing curve, then they will go straight back to the tail.
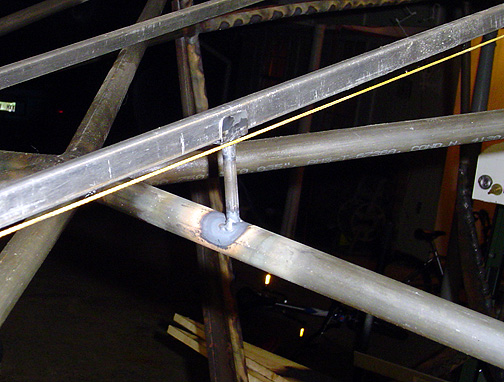
The most forward part of the top fuselage stringers are made from some 4130 tubing, in my case curved to match the the wing formers. The front edge of the curved pieces of tubing will be welded to the windshield slot and the aft end will be supported by standoff tubes. The aft end of these tubes must have an accommodation for the aluminum (or wood) stringers to attach to. What is used is a piece of .032 steel strip bent into a "U" shape and welded to the end of the tube.
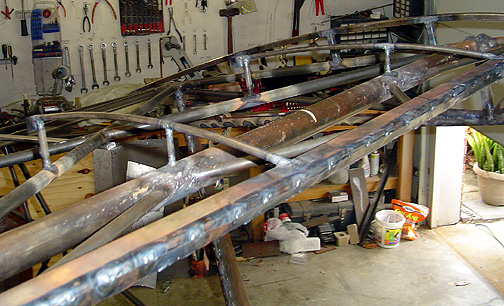
Here is a picture of both stringer tubes in place:
Now we need to make an attachment point at the tail for the stringers.
Here it is after welding and a trial fit of the two aluminum
stringers:
Note that the transition is nice and smooth from aluminum stringer to tube.
Any lumps or bumps here will show in the final finish when its wrapped
in fabric, so take your time and get this (as well as all transitions) as
smooth as possible.
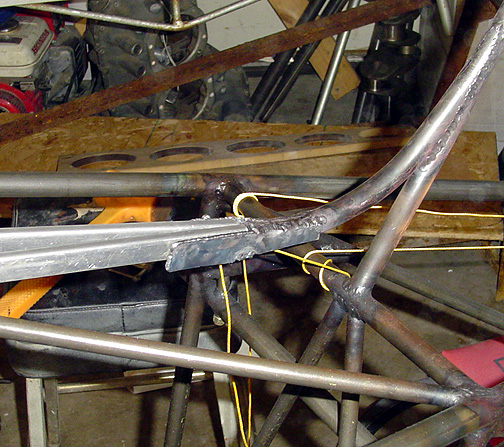
The stringers are held to shape and in position with some standoffs. These
are made from .032 mild steel "U" brackets and some 1/4" tube. Here
is one fitted and tack welded to the fuselage
As you can see, a stringer is in place. The yellow string is there
to assure a straight line of the stringer from front to rear.
The goal is to get nice straight lines side-to-side and to get a pleasing curve.
The top stringers on my Bearhawk follow the wing form curve until you get to the high point of the wing (the thickest portion) then basically make a straight line back to the Vertical fin. Some builders are creating more of a curve all the way back and I've seen one with a fairly large transition into the vertical fin. If you look at the plans Drawing #1, you will see that the top stringers curve around the wing to the top and then make a straight line to the tail with no curves.
I like that look, (sort of like a '67 fast back mustang) so I'll mine according to the plans.
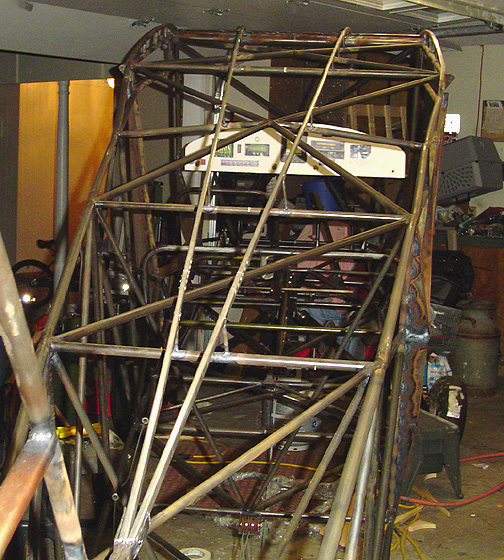
Here are the top stringers in place:
Next, we will do the bottom stringers.
Click here to go to Stringers page 2