The next part to make is the tailwheel fork. The two side pieces of the fork are a little complex. Looking at the drawings you can see they are tubular in shape but flattened to give a more streamline shape in the wind. They taper from 1.25" at the top down to 5/8" at the bottom where the tailwheel bolts on. To add further complexity, they are curved to fit around the tailwheel tire.
To make these, some 1" tube was pressed down to 1/2" thick and about 1.25" wide. This done with some heavy steel plate and a hydraulic press.
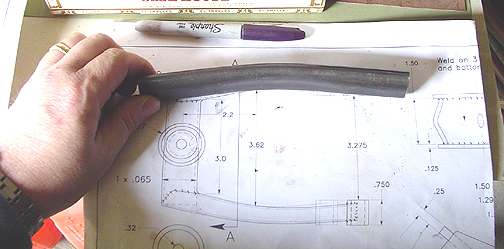
Here is the tube being compared to the full size drawing for the correct amount of bend. It needs just a touch more bend so it was put back in the press and given some more until it matched the drawing perfectly:
The forks are now the correct thickness and bent to the correct shape, but they also must taper from top to bottom. To accomplish this taper, the fork arms were slit down the middle on the bandsaw.
The 2 halves were then clamped together and the seam was welded full length.
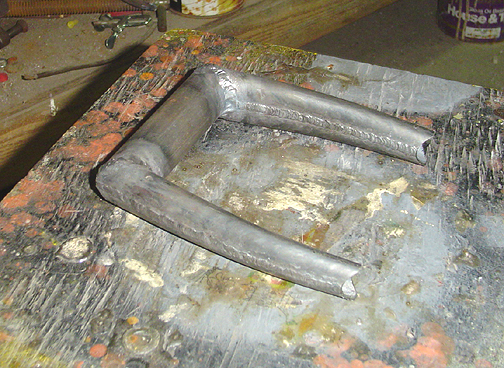
The fork arms were then machined to accept a 1" cross tube to tie the two forks together. Here is the fork assembly all welded up:
Again, this was fitted to the full size drawing previously shown. At this point the tailwheel fork is already too short but I didn't know it yet. I was making it to the full size drawing so I thought I was alight. More on that later . . .
Click here to go to Tailwheel page 3
Click here to go back to Tailwheel page 1